
The rectangular slab of plastic that shipped with the original Nintendo Entertainment System in 1985 didn’t just control games, it defined what a game controller should be for an entire generation. Today, those old Nintendo controllers and their successors have evolved from functional peripherals into coveted collectibles, with pristine examples fetching hundreds of dollars from serious collectors.
Whether you’re hunting for that childhood NES controller to complete a restoration project, looking to invest in appreciating gaming hardware, or simply want to experience classic titles the way they were meant to be played, understanding the landscape of vintage Nintendo controllers is essential. This guide covers everything from authenticating decades-old hardware to integrating it with modern setups, with specific details on pricing, restoration, and where collectors are finding the best deals in 2026.
Key Takeaways
- Authentic vintage Nintendo controllers have appreciated 300–400% over five years, with factory-sealed SNES controllers and rare N64 color variants commanding premium prices as collectible investments.
- The old Nintendo controller market requires careful authentication to avoid reproduction hardware, focusing on mold marks, gamebit screws, button feel, cable texture, and internal date codes to verify genuine products.
- Original NES, SNES, and N64 controllers can be restored through isopropyl alcohol cleaning, component replacement, and modern adapters like RetroTINK devices to work seamlessly with contemporary gaming setups.
- Rare N64 controller colors like gold and watermelon red fetch $400–700+ when factory-sealed, significantly outpacing standard gray variants due to regional exclusivity and limited production runs.
- Competitive speedrunners and retro gaming communities specifically require period-correct old Nintendo controllers for input precision and authenticity, driving sustained demand across dedicated marketplaces like r/GameSale and Heritage Auctions.
- Common failures in decades-old Nintendo controllers—such as N64 analog stick drift and unresponsive buttons—can be resolved through disassembly cleaning, membrane replacement, or the Steel Bowl upgrade for permanent stick durability.
The Evolution of Nintendo Controllers Through the Decades
Nintendo’s controller evolution tells the story of gaming innovation itself, with each generation introducing mechanics that competitors would spend years trying to replicate.
NES Controller: The Original Rectangle That Changed Gaming
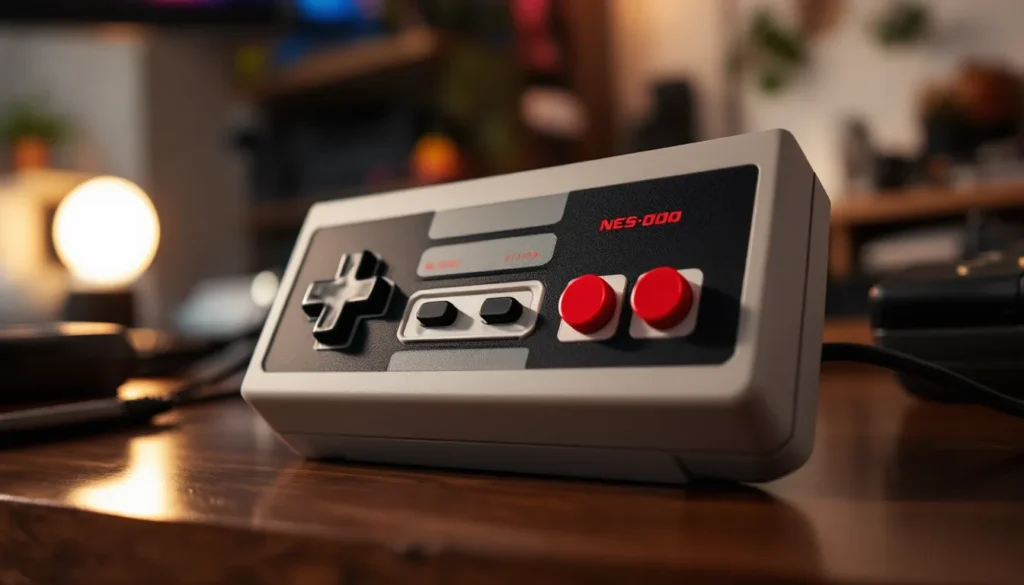
The NES-004 controller (the standard model shipped with North American NES consoles from 1985-1995) measured 4.8 × 2 inches and featured just eight inputs: a D-pad, two action buttons (A and B), Start, and Select. This minimalist design was revolutionary for eliminating the joystick-focused layouts that dominated arcades and previous home consoles.
The D-pad design, patented by Nintendo engineer Gunpei Yokoi, provided precise 8-directional input that became the standard for 2D gaming. Original NES controllers used a 7-pin connector and featured a 6-foot cable, a length that caused countless sibling disputes about who had to sit closer to the TV.
Japanese Famicom controllers differ significantly from their NES counterparts. Player 1 controllers lack Start and Select buttons (those were console-mounted), while Player 2 controllers replaced B and A with a built-in microphone. These regional differences make Famicom controllers particularly interesting for collectors.
SNES Controller: Adding Buttons and Ergonomics
The SNS-005 SNES controller (1991-1999 for North American models) expanded the button count to ten while introducing the revolutionary shoulder button concept. The L and R buttons fundamentally changed game design, enabling new mechanics like strafing in first-person games and weapon switching without removing thumbs from face buttons.
Super Nintendo controllers measured 5.3 × 2.7 inches with rounded edges that marked Nintendo’s first serious attempt at ergonomic design. The four-button diamond layout (X, Y, A, B) with color-coded buttons (purple and lavender on North American models) became iconic. Super Famicom controllers used the same layout but featured a different color scheme, multicolored convex buttons that many collectors prefer aesthetically.
The SNES controller cable extended to 5.5 feet and used a proprietary 7-pin connector incompatible with NES even though the similar pin count. Weight distribution improved significantly over the NES controller, reducing hand fatigue during extended play sessions.
N64 Controller: The Three-Pronged Revolution
The NUS-005 N64 controller (1996-2002) remains Nintendo’s most polarizing design. Its three-pronged layout measured 6.02 × 4.13 × 2.36 inches and weighed 7.2 ounces, substantially larger than previous Nintendo controllers.
The center prong housed Nintendo’s first analog stick, capable of 360-degree input with optical encoder technology that measured precise thumb movements. This analog stick would become infamous for deteriorating rapidly, with the internal gears grinding down white plastic dust that eventually caused the “loose stick” problem most N64 controllers now suffer from.
Ten buttons covered the controller: A and B on the right cluster, the C-button cluster (four yellow buttons used primarily for camera control), Start in the center, L and R shoulders, and the Z-trigger underneath. The controller also featured a Pak slot for accessories like the Rumble Pak (released 1997) and Memory Pak.
Six color variants were released in North America: standard gray, atomic purple, jungle green, fire orange, ice blue, and watermelon red. Japanese markets received additional colors including gold (bundled with specific game releases) that now command premium prices. The controller used a 6-foot cable with a proprietary 3-pin connector.
Why Vintage Nintendo Controllers Are Worth Collecting in 2026
The retro gaming market has matured from niche hobby to legitimate collectible investment category, with specific Nintendo controllers appreciating faster than many traditional collectibles.
Nostalgia and Retro Gaming Culture
The demographic that grew up with NES and SNES consoles has now reached peak earning years, creating sustained demand for childhood gaming hardware. This isn’t speculative, auction data from 2024-2026 shows consistent year-over-year price increases for sealed and mint-condition controllers.
Retro gaming tournaments and speedrunning communities specifically require original hardware for authenticity and competition rules. Games like Super Mario Bros., Super Metroid, and GoldenEye 007 have active competitive scenes where players insist on period-correct controllers for muscle memory and input precision. Modern reproductions don’t replicate the exact resistance and feel of original components.
Content creators streaming retro titles generate millions of views, with audiences specifically commenting on controller authenticity. This visibility has pushed demand beyond collectors into the casual gaming audience seeking “authentic” experiences. Gaming historians and technology review publications regularly feature retrospectives highlighting these controllers’ impact on modern design philosophy.
Investment Value and Rarity
Specific variants have shown remarkable appreciation. Factory-sealed SNES controllers in original retail packaging sold for $45-60 in 2020 but now command $180-250. N64 controllers in rare colors like gold or limited edition variants tied to specific game releases (such as the Pokémon N64 controller in orange and blue) have appreciated 300-400% in five years.
Condition dramatically affects value. Controllers rated “mint” or “near mint” by professional grading services (showing no yellowing, intact labels, tight buttons, and original cable) sell for 5-10× more than “good” condition examples with wear. A loose NES controller in played condition sells for $15-25, while a factory-sealed example can fetch $120-180.
Rarity factors beyond simple age include regional exclusivity (Japan-only colors), promotional variants (McDonald’s promo N64 controllers), and third-party licensed controllers from companies that later went out of business. Controllers bundled with specific limited-edition console sets often become rarer than the consoles themselves as controllers wore out and were replaced.
How to Identify Authentic vs. Reproduction Nintendo Controllers
The reproduction market has flooded online marketplaces with convincing fakes, but specific details separate authentic Nintendo hardware from knockoffs.
Mold marks and text: Authentic NES controllers feature specific mold marks on the rear shell. Look for “NES-004” molded into the plastic near the cable entry point. The Nintendo seal of quality should appear on the front, with crisp, well-defined edges. Reproduction controllers often feature blurry or slightly off-center seals.
Screw type matters: Original Nintendo controllers used 3.8mm gamebit security screws (a proprietary bit with a forked tip). If a controller uses Phillips-head screws, it’s been opened and potentially had components replaced, or it’s a reproduction. The screw holes should show no stripping or damage on authentic examples.
Cable and connector specifics: Original controller cables featured specific wire gauges and rubber compositions that feel distinctly different from reproduction cables. Authentic cables have a particular flexibility and texture, not too stiff, not too rubbery. The connector housings should fit snugly into console ports with no wiggle. Reproduction connectors often feel loose or require excessive force.
Button quality and feel: Original A and B buttons on NES controllers have specific resistance curves. They should click with a satisfying tactile response, not mushy, not overly stiff. SNES button colors should match exact Pantone specifications: North American buttons use specific purple and lavender shades that reproductions rarely match perfectly. Super Famicom buttons should be convex (rounded outward) rather than concave.
Weight and plastic composition: Authentic controllers have specific weights due to internal component quality. An NES controller should weigh approximately 3.2-3.5 ounces. Reproductions often feel lighter due to cheaper internal components. The plastic should have a slight texture, not completely smooth and glossy like cheap reproductions.
D-pad pivot mechanism: The D-pad on authentic controllers uses a specific pivot design that allows diagonal inputs while maintaining distinct directional clicks. Press each direction and feel for consistent resistance and a clean return to center. Reproduction D-pads often feel mushy or have dead zones.
Serial numbers and date codes: Many authentic Nintendo controllers feature molded date codes inside the battery compartment or on internal PCBs (visible after disassembly). These codes indicate manufacturing date and factory. Reproductions either lack these entirely or feature incorrect formatting.
Where to Buy Old Nintendo Controllers Today
Finding authentic vintage controllers requires knowing which marketplaces attract serious sellers versus resellers dumping reproduction hardware.
Online Marketplaces and Auction Sites
eBay remains the largest marketplace for vintage Nintendo controllers, but buyer vigilance is essential. Search specifically for “authentic,” “original,” or “OEM” (Original Equipment Manufacturer) and examine seller photos carefully. Sellers with 98%+ positive feedback and specific descriptions including mold marks and date codes are more reliable. Expect to pay $20-35 for used NES controllers, $35-55 for SNES controllers in good condition, and $40-75 for N64 controllers depending on color and stick condition.
Mercari and Facebook Marketplace offer better prices than eBay since sellers often undervalue items, but authentication falls entirely on the buyer. Local pickup options let you test controllers before purchasing. Many Nintendo enthusiasts frequent these platforms specifically hunting underpriced lots.
r/GameSale on Reddit connects buyers with vetted sellers who face community accountability. Prices tend slightly below eBay but above Facebook Marketplace. The subreddit requires timestamped photos and has strict anti-scam policies. This community approach often yields honest condition assessments.
Heritage Auctions and ComicConnect handle high-end collectible gaming hardware including graded, sealed controllers. These platforms charge buyer’s premiums (17-20%) but guarantee authenticity. Serious collectors targeting investment-grade pieces should focus here rather than open marketplaces.
Retro Gaming Stores and Conventions
Brick-and-mortar retro gaming stores provide tested controllers with return policies. Chains like The Exchange and regional stores offer 30-90 day warranties on used hardware. Prices run 10-20% higher than online but include the peace of mind of pre-tested functionality.
Gaming conventions like Portland Retro Gaming Expo, Too Many Games (Pennsylvania), and regional retro expos feature vendor halls with dozens of sellers. Competition keeps prices reasonable, and face-to-face transactions let buyers inspect hardware thoroughly. Convention exclusives and rare variants appear here before hitting online marketplaces.
Local game stores often have unsorted bulk lots where knowledgeable buyers can find deals. Building relationships with store owners can result in first-call opportunities when rare items arrive. Many stores maintain want lists and will contact collectors when specific items appear.
Cleaning and Restoring Your Vintage Nintendo Controllers
Proper restoration can transform a yellowed, sticky controller into a functional collectible, but aggressive cleaning can destroy value on rare variants.
Disassembly and Basic Cleaning Techniques
Tools needed: 3.8mm gamebit screwdriver, 70-90% isopropyl alcohol, cotton swabs, soft toothbrush, microfiber cloths, and patience. Never use water-based cleaners or harsh chemicals that can damage plastic or leave residue on electronic contacts.
Disassemble the controller by removing the gamebit screws (typically 5-6 screws depending on model). Photograph the disassembly process for reassembly reference, especially button and membrane placement. NES and SNES controllers use conductive rubber membranes that must align precisely with PCB contacts.
Shell cleaning: For external plastic shells, isopropyl alcohol on a microfiber cloth removes most grime. Stubborn residue responds to gentle scrubbing with a soft toothbrush dipped in alcohol. Avoid abrasive cleaners that scratch plastic. For yellowing on gray plastic (caused by bromine compound oxidation), some collectors use Retr0bright treatments, but these can cause uneven results and potentially weaken plastic over time.
PCB and contact cleaning: Clean the printed circuit board with isopropyl alcohol on cotton swabs. Focus on button contacts where conductive rubber membranes make connection, these areas accumulate conductive residue that causes button failures. Clean both the PCB contacts and the conductive rubber pads on button membranes. Let components dry completely (10-15 minutes) before reassembly.
Cable and connector maintenance: Wipe cables with alcohol-dampened cloth to remove skin oils and grime. Inspect connectors for bent or corroded pins. If pins are corroded, carefully clean with alcohol-dipped cotton swabs. Bent pins can sometimes be straightened with precision tweezers, but excessive force will snap them.
Replacing Worn Components and Buttons
N64 analog sticks present the most common replacement need. Original sticks use optical encoder wheels that wear down gears contacting the stick shaft. Replacement options include OEM replacement sticks salvaged from parts controllers ($12-18) or aftermarket solutions. The Kitsch-Bent Steel Bowl upgrade ($15-20) replaces plastic gears with steel, eliminating future wear. Installation requires soldering skills for some variants.
Button replacements are available from multiple aftermarket suppliers. RetroModding and Retro Game Repair Shop offer OEM-quality replacement buttons in original and custom colors ($8-15 per set). Buttons should snap firmly into shell mounting points and move freely without binding.
Conductive rubber membranes degrade over time, causing button failures. Replacement membranes ($5-8 per set) restore proper button response. Some gaming hardware reviewers have tested various replacement membrane brands, with OEM Nintendo parts (when available) performing identically to originals.
Cables rarely require replacement unless damaged, but when needed, aftermarket options exist ($10-15). These typically feature modern wire insulation rather than period-correct rubber, which may matter for purist collectors but performs identically.
After component replacement, test thoroughly before final reassembly. Button presses should feel consistent with proper tactile click. Analog sticks should return smoothly to center with no drift. D-pad diagonals should register accurately.
Using Old Nintendo Controllers With Modern Gaming Setups
Original Nintendo controllers weren’t designed for HDMI outputs and modern displays, but adapter technology has evolved to bridge the gap.
Adapter Options for Contemporary TVs and Consoles
The most straightforward approach uses original consoles with modern display adapters. RetroTINK devices (RetroTINK-2X Pro at $140, RetroTINK-5X Pro at $300) accept composite or S-Video from original consoles and output clean HDMI with minimal lag. These devices preserve the authentic feel of original hardware while eliminating the need for CRT televisions.
For players wanting to use original controllers with modern Nintendo hardware, the Nintendo Switch GameCube adapter provides interesting compatibility. While designed for GameCube controllers, similar technology could eventually support other legacy controllers through third-party solutions, though as of 2026 no official adapters exist for NES/SNES/N64 controllers on Switch.
8BitDo offers the 8BitDo Retro Receiver series that allows wireless and wired classic controllers to connect to Nintendo Switch, PC, and other modern platforms via USB. The NES and SNES versions ($20-25) accept original wired controllers through proprietary adapters. Input lag measures approximately 4-8ms, acceptable for casual play but potentially noticeable to competitive players.
Raphnet Technologies produces controller adapters for nearly every vintage controller-to-modern-console combination. Their N64-to-USB adapter ($30) preserves original analog stick precision for PC use. These adapters support both Windows and Linux with proper drivers.
Emulation and PC Gaming Compatibility
For emulation purists, original controllers enhance authenticity. USB adapters from Raphnet and Retrode ($40-70) convert original controller inputs to PC-compatible signals. The Retrode 2 specifically supports cartridge dumping alongside controller input, making it a two-function device for serious retro enthusiasts.
Emulator software like RetroArch, ZSNES, and Project64 recognize these adapters as standard USB HID devices with proper configuration. Input mapping should replicate original button layouts, resist the temptation to remap controls to “more convenient” layouts, as this defeats the purpose of using period-correct hardware.
Input lag becomes critical for emulation. Direct USB adapters typically introduce 4-8ms lag. Bluetooth wireless adapters add 8-16ms depending on chipset quality. For comparison, playing on original hardware via CRT displays produces effectively zero input lag. Competitive speedrunners typically refuse any setup exceeding 8ms total lag.
Specific emulator settings can minimize lag. RetroArch’s “Run-Ahead” feature predicts input timing to compensate for emulation lag. Combined with quality adapters and gaming monitors with <4ms response times, the total lag chain can approach original hardware performance.
Some PC titles specifically support classic controller inputs. Indie platformers and retro-styled games often include control schemes designed for NES and SNES layouts. Steam Input mapping allows original Nintendo controllers to function in any Steam title, though configuration requires patience.
Pricing Guide: What Are Old Nintendo Controllers Worth?
Controller values fluctuate based on condition, rarity, and market demand. These 2026 price ranges reflect completed sales from major marketplaces:
NES Controllers (NES-004):
- Loose, played condition: $15-25
- Good condition (clean, functional, minor wear): $25-40
- Excellent condition (minimal yellowing, tight buttons): $45-70
- Mint/near-mint: $80-120
- Factory sealed: $120-180
NES Max and NES Advantage:
- NES Max (turbo controller): $40-65 loose, $180-250 sealed
- NES Advantage (arcade stick): $60-90 loose, $300-450 sealed
SNES Controllers (SNS-005):
- Loose, played condition: $25-40
- Good condition: $40-60
- Excellent condition (no yellowing): $70-95
- Mint/near-mint: $100-150
- Factory sealed: $180-280
Super Famicom Controllers:
- Standard loose: $30-45 (premium for colorful buttons)
- Excellent condition: $60-85
- Factory sealed: $150-220
N64 Controllers (NUS-005):
Pricing varies dramatically by color and stick condition.
Standard gray:
- Loose, loose stick: $25-35
- Loose, tight stick: $50-75
- Excellent, tight stick: $85-120
- Factory sealed: $200-300
Common colors (atomic purple, jungle green, fire orange):
- Loose, tight stick: $65-95
- Excellent condition: $110-160
- Factory sealed: $280-400
Rare colors (gold, watermelon, ice blue):
- Loose, tight stick: $90-150
- Excellent condition: $160-250
- Factory sealed: $400-700+
Limited editions and promotional controllers:
- Pikachu N64 controller (blue/orange): $150-250 loose excellent condition
- Gold N64 controller: $200-350 loose excellent condition
- Game-bundled special editions: $120-300+ depending on title
Third-party notable controllers:
- Hori Mini Pad (SNES): $40-70 loose
- ASCII Pad (N64): $35-60 loose
- Competition Pro (NES): $25-45 loose
Condition assessment critically impacts pricing. “Excellent” means no yellowing on gray plastics, no worn labels, tight/responsive buttons, and fully functional D-pad/analog stick. “Mint” requires near-perfect cosmetic condition with original packaging elements (even without factory seal). Professional grading services like WATA and VGA grade controllers, adding 20-40% to values for high-grade examples.
Common Issues and Troubleshooting for Retro Controllers
Decades-old hardware develops predictable failures. Understanding these issues helps collectors make informed purchase decisions and perform effective repairs.
Unresponsive buttons: The most common failure results from oxidized contacts between conductive rubber membranes and PCB traces. Disassemble the controller and clean both PCB contacts and rubber membrane surfaces with 90% isopropyl alcohol. If cleaning doesn’t restore function, the conductive material on rubber membranes has deteriorated, replace the membrane.
Sticky or mushy buttons: This indicates grime accumulation inside button wells or degraded membrane rubber. Clean button wells thoroughly with alcohol and cotton swabs. If buttons remain mushy after cleaning, replace the rubber membrane. Original Nintendo membranes maintain elasticity better than most aftermarket options.
N64 analog stick drift and looseness: The notorious N64 stick problem stems from plastic gears grinding against the stick shaft. White plastic dust accumulates inside the stick mechanism. Cleaning temporarily improves function, but worn gears require replacement. The steel bowl replacement mod permanently solves this issue by replacing plastic with hardened steel components.
Directional input failures on D-pads: If specific directions don’t register, the pivot mechanism under the D-pad may be damaged or the membrane contacts are worn. Inspect the pivot (a cross-shaped plastic component) for cracks or breaks. If damaged, salvage parts from donor controllers. If the pivot is intact, clean or replace the membrane.
Cable connection problems: Intermittent connectivity typically indicates damaged wires near the cable entry point where repeated flexing causes internal breaks. Carefully disassemble the cable strain relief and inspect for broken wires. Minor breaks can be soldered, but extensive damage requires cable replacement. Test continuity with a multimeter before resolving to cable replacement.
Connector pin corrosion: Green or white buildup on connector pins indicates oxidation. Clean pins with isopropyl alcohol on cotton swabs. For stubborn corrosion, use electronic contact cleaner (NOT WD-40, which leaves residue). Severely corroded pins may require careful polishing with very fine grit sandpaper (1500-2000 grit), but this risks damaging pins.
Yellowing plastic: UV exposure causes bromine flame retardants in ABS plastic to oxidize, creating yellow discoloration. This is primarily cosmetic. Retr0bright treatments (hydrogen peroxide cream with UV exposure) can reverse yellowing, but results vary and can cause uneven coloring or plastic embrittlement. Many collectors prefer natural patina over risky restoration attempts.
Shoulder button failures (L/R on SNES/N64): These buttons use tactile switches soldered to the PCB rather than membrane contacts. Failed switches require desoldering and replacement with equivalent tactile switches (typically 6mm through-hole momentary switches). This requires moderate soldering skills and proper tools.
Testing after repairs: Before full reassembly, connect the controller to console and test every input. Button presses should register consistently. D-pads should recognize all eight directions including clean diagonal inputs. N64 analog sticks should return precisely to center with no drift. Shoulder buttons should click definitively.
Conclusion
Old Nintendo controllers represent more than nostalgia, they’re functional pieces of gaming history that influenced every controller design that followed. The transition from the simple NES rectangle to the experimental N64 trident mapped directly onto gaming’s evolution from 2D to 3D, and these controllers remain the most authentic way to experience the games that defined those eras.
For collectors, the market in 2026 offers both opportunity and challenge. Authentic controllers are appreciating steadily, particularly rare variants and sealed examples, but reproduction hardware floods marketplaces. Success requires knowledge of authentication details, patience in hunting deals, and realistic expectations about condition versus price.
Whether you’re building a complete Nintendo collection, restoring childhood hardware, or simply want to replay Super Mario World with the controller it was designed for, the vintage controller market remains accessible. The community of retro gaming enthusiasts, from competitive speedrunners to casual collectors, continues growing. These controllers aren’t museum pieces locked behind glass, they’re tools that still deliver the precise, satisfying input that made Nintendo’s games legendary.