
Japan opened its doors to the Nintendo Museum in October 2024, and it’s already cemented itself as a pilgrimage site for gamers worldwide. This isn’t just another corporate exhibit with a few dusty cartridges behind glass, it’s an interactive celebration of 135 years of gaming history, from hanafuda playing cards to the Switch era. Located in Uji, just outside Kyoto, the museum offers hands-on experiences with consoles you’ve only seen in YouTube documentaries, plus exclusive merchandise that’ll make your collector friends jealous. Whether you’re planning your first trip to Japan or you’re a seasoned traveler looking to add something special to your Kyoto itinerary, this guide covers everything you need to know: how to book tickets (spoiler: you can’t just walk in), what exhibits are worth the hype, and how to maximize your time inside Nintendo’s gaming temple.
Key Takeaways
- The Nintendo Museum in Uji, Kyoto offers over 7,000 square meters of interactive exhibits and playable gaming zones celebrating 135 years of Nintendo history from hanafuda cards to the Switch era.
- Advance reservations are mandatory—book exactly three months ahead when slots open on the first of each month at 10:00 AM Japan Standard Time, as popular dates sell out within hours.
- Interactive highlights include oversized NES/SNES controllers requiring team coordination, motion-controlled shooting galleries, and exclusive access to the Nintendo PlayStation prototype—a mythical collaboration never released to the public.
- Weekday morning visits (Tuesday–Thursday, 10:00 AM slots) offer the shortest wait times and best availability compared to weekend crowds and Japanese holiday periods.
- Plan for 3–4 hours to comfortably explore all exhibits and interactive stations; admission is ¥3,300 for adults with digital coins included, and the museum’s gift shop stocks exclusive merchandise unavailable elsewhere.
- Location accessibility from Kyoto Station is straightforward via the JR Nara Line to Obaku (20 minutes), followed by a 15-minute walk, making the Nintendo Museum an ideal day-trip addition to any Japan itinerary.
What Is the Nintendo Museum and Why Should Gamers Visit?
The Nintendo Museum is an official company-run facility showcasing the evolution of Nintendo from its 1889 founding as a playing card manufacturer to its current status as a gaming giant. Unlike fan-created museums or temporary pop-ups, this is the real deal, curated by Nintendo itself with access to prototypes, rare hardware, and archival materials that have never been publicly displayed.
What sets this museum apart is the playable aspect. You’re not just staring at a Game Boy Color through plexiglass. The museum features oversized controllers that require team coordination to play classic NES games, motion-controlled experiences that reimagine retro titles, and interactive shooting galleries using Nintendo’s early toy products. It’s part history lesson, part arcade, and entirely worth the trip for anyone who’s ever argued about console wars or speedrun strategies.
The facility also dives deep into Nintendo’s pre-gaming era, displaying hanafuda cards, the Ultra Hand toy, and the Love Tester, products that show the company’s innovation DNA existed long before Mario. For gamers who’ve only known Nintendo through consoles, seeing the company’s full timeline reframes how you think about their design philosophy and willingness to pivot into uncharted territory.
Where Is the Nintendo Museum Located?
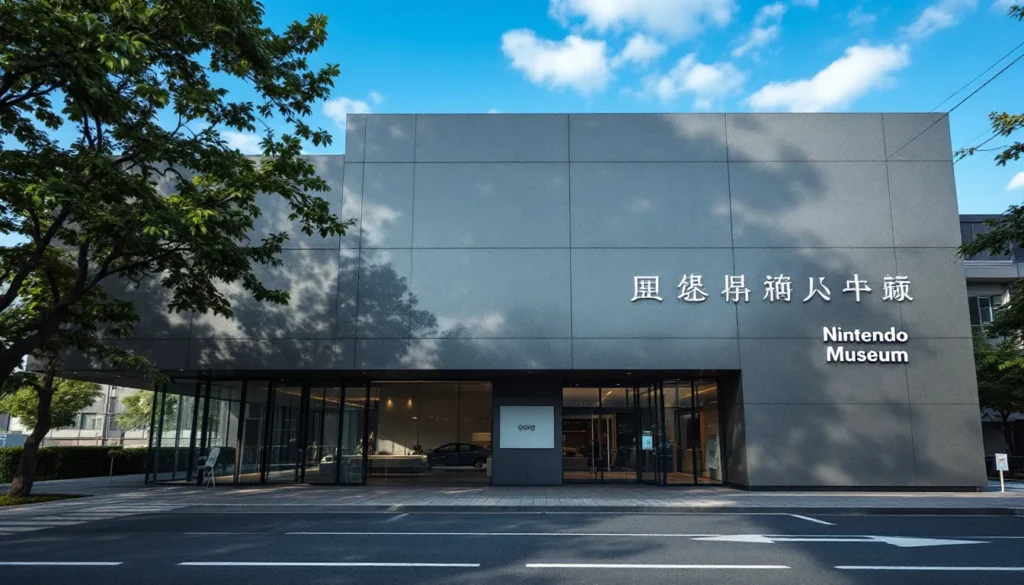
The museum sits in Uji City, Kyoto Prefecture, about 30 minutes south of central Kyoto. The address is 11-1 Ogura-cho Ogakubo, Uji, and it’s housed in a renovated former manufacturing plant where Nintendo actually produced playing cards and later some of their early gaming products. The building itself is part of the experience, industrial architecture meets modern exhibit design.
Uji is better known for its green tea and the UNESCO-listed Byodoin Temple, so this location puts Nintendo on a map dominated by traditional Japanese culture. That contrast is intentional. Nintendo wanted the museum in a location that reflects its roots rather than dropping it in Tokyo’s tourist district.
Getting to the Museum from Kyoto
From Kyoto Station, take the JR Nara Line to Obaku Station (about 20 minutes). The museum is a 15-minute walk from Obaku, or you can catch a local bus that runs directly to the facility. Signage in English is clear, and Google Maps routes work reliably in this area.
If you’re staying in Osaka, take the Keihan Line to Chushojima Station, then transfer to the JR Nara Line toward Nara and get off at Obaku. Total travel time is roughly 50 minutes. A taxi from Kyoto Station runs about ¥3,500–¥4,000 ($24–$28 USD), which is reasonable if you’re traveling in a group.
The museum doesn’t have dedicated parking for general visitors, so public transit is strongly recommended. Japan Rail Pass holders can use the JR Nara Line at no extra cost, making this an easy day trip add-on.
Nearby Attractions and Accommodations
Uji itself offers several worthwhile stops. Byodoin Temple, featured on the ¥10 coin, is a 10-minute walk from Obaku Station and pairs well with a museum visit if you’ve got time. The temple grounds are stunning in spring (cherry blossoms) and fall (red maples). Ujigami Shrine, one of Japan’s oldest Shinto shrines, is also within walking distance.
For accommodations, most international visitors stay in central Kyoto and day-trip to the museum. The Hotel Granvia Kyoto (connected to Kyoto Station) offers convenience for early departures. If you prefer something closer to Uji, the Hanayashiki Ukifune-en is a traditional ryokan with private open-air baths, though it’s pricier and books up months in advance. Budget travelers can find business hotels near Obaku Station for ¥6,000–¥8,000 per night, though options are limited compared to Kyoto proper.
What to Expect Inside the Nintendo Museum
The museum spans two floors and covers roughly 7,000 square meters of exhibit and play space. Nintendo designed the flow to be chronological, starting with the company’s founding and moving through each era up to the Switch and beyond. Audio guides are available in multiple languages, though the interactive elements are largely self-explanatory.
Interactive Exhibits and Playable Gaming Zones
The Experience Zone on the second floor is where most visitors spend the bulk of their time. Here’s what you’ll find:
- Giant Controller Challenge: Oversized NES and SNES controllers mounted on the floor require two players to coordinate movement and button presses. It’s harder than it looks, especially on games like Super Mario Bros. where timing is critical.
- Zapper & Scope SP: Updated versions of the NES Zapper and Super Scope let you play shooting gallery games on massive screens. The tech uses modern motion sensors, so accuracy actually matters.
- Craft & Play Workshops: Hands-on stations where you can assemble simple toys or experiment with game design concepts inspired by Nintendo’s early toy products.
- Love Tester and Ultra Hand Zones: Fully functional versions of these 1960s/70s Nintendo toys. The Love Tester still delivers hilariously arbitrary compatibility readings.
Many interactive exhibits use digital coins distributed with your admission ticket. You load these onto a wristband and spend them at different stations, so budget your coins wisely, running out means you’ll have to choose which experiences to skip. Major gaming news outlets like Gematsu covered the museum’s opening and noted that weekday visitors tend to have more coin-spending freedom due to shorter lines.
Historical Displays and Rare Console Collections
The first floor houses the archival exhibits. Glass cases display every major Nintendo console from the Color TV-Game 6 (1977) to the Switch OLED model (2021), including regional variants most collectors have never seen in person. You’ll spot prototypes like the Nintendo PlayStation, the failed Sony collaboration that nearly changed gaming history.
Rare games are everywhere: boxed copies of Stadium Events, Japanese-exclusive Famicom Disk System titles, and even a playable Virtual Boy unit (yes, it still gives you a headache after five minutes). The museum also showcases design documents, patent drawings, and internal memos that reveal how products evolved, like early sketches of the Game Boy that look nothing like the final hardware.
One standout display tracks the evolution of Mario across every console generation, showing polygon counts, sprite designs, and voice samples. It’s a masterclass in how technological constraints shaped character design.
Exclusive Merchandise and Gift Shop Highlights
The museum’s gift shop is dangerous for your wallet. Items you won’t find anywhere else include:
- Museum-exclusive hanafuda cards with Nintendo character designs
- Replica Ultra Hand toys in modern colors
- Apparel featuring pre-gaming Nintendo logos and branding
- Limited-run amiibo figures of retro characters
- Archival reproduction posters from 1980s Japanese ad campaigns
Prices range from ¥500 for stickers to ¥15,000+ for premium replica toys. Credit cards are accepted, and tax-free shopping is available for international visitors with passport verification. The shop gets crowded near closing time, so visit mid-day if you want breathing room to browse.
Ticket Information: How to Book and What It Costs
Nintendo doesn’t sell walk-up tickets. Every visitor must reserve a time slot in advance through the museum’s official website. This reservation system prevents overcrowding and keeps wait times for interactive exhibits manageable, a lesson learned from Universal Studios Japan’s Super Nintendo World, which regularly hits capacity.
Reservation System and Advance Booking Tips
Reservations open three months in advance on the first day of each month at 10:00 AM Japan Standard Time. Slots for April 2026, for example, become available on January 1, 2026. Popular dates (weekends, Japanese holidays) sell out within hours, sometimes minutes.
The booking process requires:
- Creating an account on the museum’s website (English interface available)
- Selecting your preferred date and entry time (slots run hourly from 10:00 AM to 4:00 PM)
- Choosing ticket quantity (up to 8 per reservation)
- Confirming via email with a QR code for entry
Pro tip: Book on weekday mornings (Tuesday–Thursday, 10:00 AM–12:00 PM slots) for the best availability and smallest crowds. If your preferred date is sold out, check back 48 hours before, cancellations occasionally open up last-minute slots.
Ticket Prices and Group Discounts
As of March 2026, admission costs:
- Adults (18+): ¥3,300 (about $23 USD)
- Students (12–17): ¥2,200 (about $15 USD)
- Children (6–11): ¥1,100 (about $7.50 USD)
- Under 6: Free (but still require a reservation)
Group discounts (10+ people) knock off roughly 10% per ticket but must be arranged via email at least two weeks in advance. School groups and educational tours receive steeper discounts with advance approval and documentation.
The ticket price includes your digital coin allotment for interactive exhibits, so there are no hidden upcharges once you’re inside. Food and drinks are sold separately at the museum café, with prices typical for Japanese tourist attractions (¥800–¥1,200 for meals).
Best Times to Visit the Nintendo Museum
Timing your visit can make the difference between breezing through exhibits and standing in lines for 30 minutes per interactive station. The museum’s popularity hasn’t cooled since opening, and certain periods are predictably chaotic.
Seasonal Considerations and Peak Visitor Periods
Avoid these peak times unless you enjoy crowds:
- Japanese national holidays (Golden Week in late April/early May, Obon in mid-August, New Year period)
- Weekends year-round, especially Saturdays
- School vacation periods (late July through August, late March)
Best times to visit:
- Weekday mornings (Tuesday–Thursday, first entry slot at 10:00 AM)
- Late January through early March (post-New Year lull before spring tourism kicks in)
- Late September through early November (pleasant weather, fewer domestic tourists)
Weather doesn’t heavily impact the experience since the museum is entirely indoors, but Kyoto’s summer heat and humidity make the walk from Obaku Station miserable in July and August. Spring and fall offer the bonus of scenic surroundings if you’re visiting other Uji attractions.
Recommended Duration for Your Visit
Plan for 3–4 hours to see everything at a comfortable pace. Speedrunners who skip interactive exhibits and focus only on displays can finish in 2 hours, but you’re missing the point. If you want to max out every interactive station, try every game, and linger in the gift shop, budget 5+ hours.
The museum doesn’t have a strict exit time, but staff start gently herding visitors toward the exit about 30 minutes before closing (6:00 PM). Your entry time slot determines when you get in, not when you have to leave, so morning slots give you maximum flexibility.
Essential Tips for International Visitors
Traveling to Japan for the first time, or just unfamiliar with how Japanese museums operate? A few logistical considerations will save you headaches.
Language Support and Accessibility Features
English signage is extensive throughout the museum, and exhibit descriptions are translated for major displays. The audio guide (included with admission) offers narration in English, Japanese, Chinese, and Korean. Interactive exhibits use visual instructions that transcend language barriers, though some of the more text-heavy historical panels remain Japanese-only.
Accessibility features include:
- Wheelchair access to all exhibit floors via elevators
- Accessible restrooms on both levels
- Companion support for visitors with disabilities (companions can enter free with advance notice)
- Sensory-friendly hours on select weekday mornings with reduced crowds and lower ambient noise
Visitors with mobility concerns should note that some interactive exhibits require standing or quick movements (like the giant controller games), but staff can suggest alternative experiences.
Photography Rules and Visitor Etiquette
Photography is permitted in most areas for personal use, but flash photography and tripods are banned. Certain rare artifact displays and prototype sections prohibit all photography, staff will clearly mark these zones. Respect the rules: museum security is polite but firm.
General etiquette tips:
- Keep voices low in exhibit areas. Japanese museum culture favors quiet observation.
- Don’t hog interactive exhibits. If there’s a line, limit your playtime to 5–10 minutes.
- Backpacks larger than standard daypacks must be checked at coat storage (free lockers available).
- Food and drinks aren’t allowed in exhibit spaces, only in designated café and rest areas.
Some visitors treat the museum like a theme park and talk loudly or rush through. Don’t be that person. Publications like Nintendo Life have covered visitor behavior at the museum, noting that maintaining a respectful atmosphere keeps the experience enjoyable for everyone.
Must-See Highlights and Hidden Gems at the Museum
With limited time and digital coins, prioritize these standouts:
Top Tier:
- Nintendo PlayStation Prototype: The mythical Sony collaboration that never launched. This is the only public display of a working unit, and it’s surrounded by design docs explaining why the partnership collapsed.
- Hanafuda Card Manufacturing Demonstration: A live workshop where artisans create traditional hanafuda cards using century-old techniques. Runs twice daily at 11:30 AM and 2:30 PM.
- Giant Controller Co-op Games: The most Instagrammable and genuinely challenging experience. Bring a friend who won’t rage-quit.
- Virtual Boy Station: Your one chance to play this infamous console without buying one off eBay for $300.
Hidden Gems:
- Gunpei Yokoi Memorial Exhibit: A quiet corner dedicated to the Game Boy creator and toy inventor. Includes his original Ultra Hand sketches and personal notes on portable gaming philosophy.
- Regional Console Variants Display: See the Hyundai Comboy (Korean NES), the iQue Player (Chinese N64), and other region-locked rarities you’ve only read about on forums.
- Sound Archive Listening Stations: Headphones let you sample iconic sound effects and music from every Nintendo generation. Hearing the original Super Mario Bros. theme in isolated 8-bit glory hits different.
- Early Draft Character Designs: Sketches of Mario, Link, and Samus that look wildly different from their final forms. Link almost had a sci-fi aesthetic before settling into fantasy.
If you’re into Japanese gaming history specifically, the section on Nintendo’s 1980s arcade competition with Sega and Namco provides context rarely covered outside specialized gaming outlets like Siliconera. It’s easy to overlook in favor of flashier exhibits, but the archival newspaper clippings and market share charts are fascinating.
Don’t sleep on the Café Break Area either. The menu includes themed items like 1-Up Mushroom Melon Soda and Fire Flower Curry, but the real draw is the seating area’s wall mural, a massive timeline of every Nintendo game release from 1980 to present, organized by console and color-coded by genre. Hardcore fans spend 20+ minutes just photographing sections of it.
Planning Your Visit: Checklist and Pro Tips
Use this checklist to nail your museum trip:
Before You Go:
- Book tickets exactly three months in advance when reservations open
- Download the museum’s official app (optional but includes a digital map and exhibit previews)
- Charge your phone fully, you’ll be taking photos and possibly using the app for audio guides
- Wear comfortable shoes: you’ll be standing and walking for hours
Day-Of Essentials:
- Bring your reservation QR code (printed or on your phone)
- Arrive 15 minutes before your time slot to clear entry and coat check
- Carry a small bag to avoid locker hassles (large bags must be stored)
- Have cash on hand for café purchases if you don’t want to rely on cards
During Your Visit:
- Hit the Interactive Zone first while you have peak energy and before afternoon crowds build
- Budget your digital coins early, don’t blow them all on the first three exhibits
- Take a café break midway to reset and avoid museum fatigue
- Visit the gift shop last so you’re not carrying bags through exhibits
Pro Tips:
- If you’re visiting the Nintendo Museum Tokyo (a smaller, unofficial fan museum in Akihabara), don’t confuse it with this official Kyoto facility. The Kyoto museum is the main attraction and far more comprehensive.
- Check Nintendo’s official channels for special events or limited exhibits that rotate every few months. Past events included speedrunner appearances and developer Q&A sessions.
- Combine your museum visit with a Kyoto gaming café crawl. Uji is close enough to make an afternoon of retro arcades and board game cafés in central Kyoto afterward.
- Join the museum’s digital newsletter for early access to special event reservations and limited-edition merch drops.
Common mistakes to avoid: showing up without a reservation (you won’t get in), underestimating travel time from Kyoto Station (traffic and transfers add up), and skipping the historical exhibits in favor of only interactive content (you’re missing half the story).
Conclusion
The Nintendo Museum isn’t just a nostalgia trip, it’s a hands-on history of how one company shaped modern gaming through innovation, adaptation, and a willingness to take ridiculous risks (looking at you, Virtual Boy). Whether you’re a lifelong fan or just curious about gaming’s roots, the museum delivers depth and interactivity that few gaming landmarks match. Book your tickets early, plan for a half-day commitment, and leave room in your suitcase for merchandise. If you’re already planning a Japan trip for 2026, this should be on your itinerary alongside Akihabara, retro game hunting in Osaka’s Den Den Town, and whatever else your gaming bucket list demands.